


Tools · · 7 min read
Generative fill inside a paint app, with models that stay on your machine
The Krita AI Diffusion plugin puts inpainting, regions and control layers on a real canvas, running Flux 2 or Z-Image on your own GPU. What it does, and what it needs.
If you want generative fill without a subscription, a browser tab or an upload, the most complete free option is a plugin: Acly's Generative AI for Krita, which adds an AI Image Generation docker to Krita and runs open models on your own hardware. It is GPL licensed, it drives a local ComfyUI server that it can install for you, and the thing that makes it worth a designer's attention is not the generation. It is that generation happens inside a document with selections, layers and masks.
The catch is hardware. The repository recommends a graphics card with at least 6GB of VRAM, and says CPU generation is "supported, but very slow".
This is written from the krita-ai-diffusion repository, read on 22 September 2026. The screenshots are the project's own.
Selections do the art direction
In a chat-style generator, the picture is the unit of work. In Krita, the selection is. The plugin's stated first goal is "Precision and Control", and it lists the levers: restrict generation to selections, refine existing content with a variable degree of strength, focus text on image regions, and guide generation with reference images, sketches, line art and depth maps.
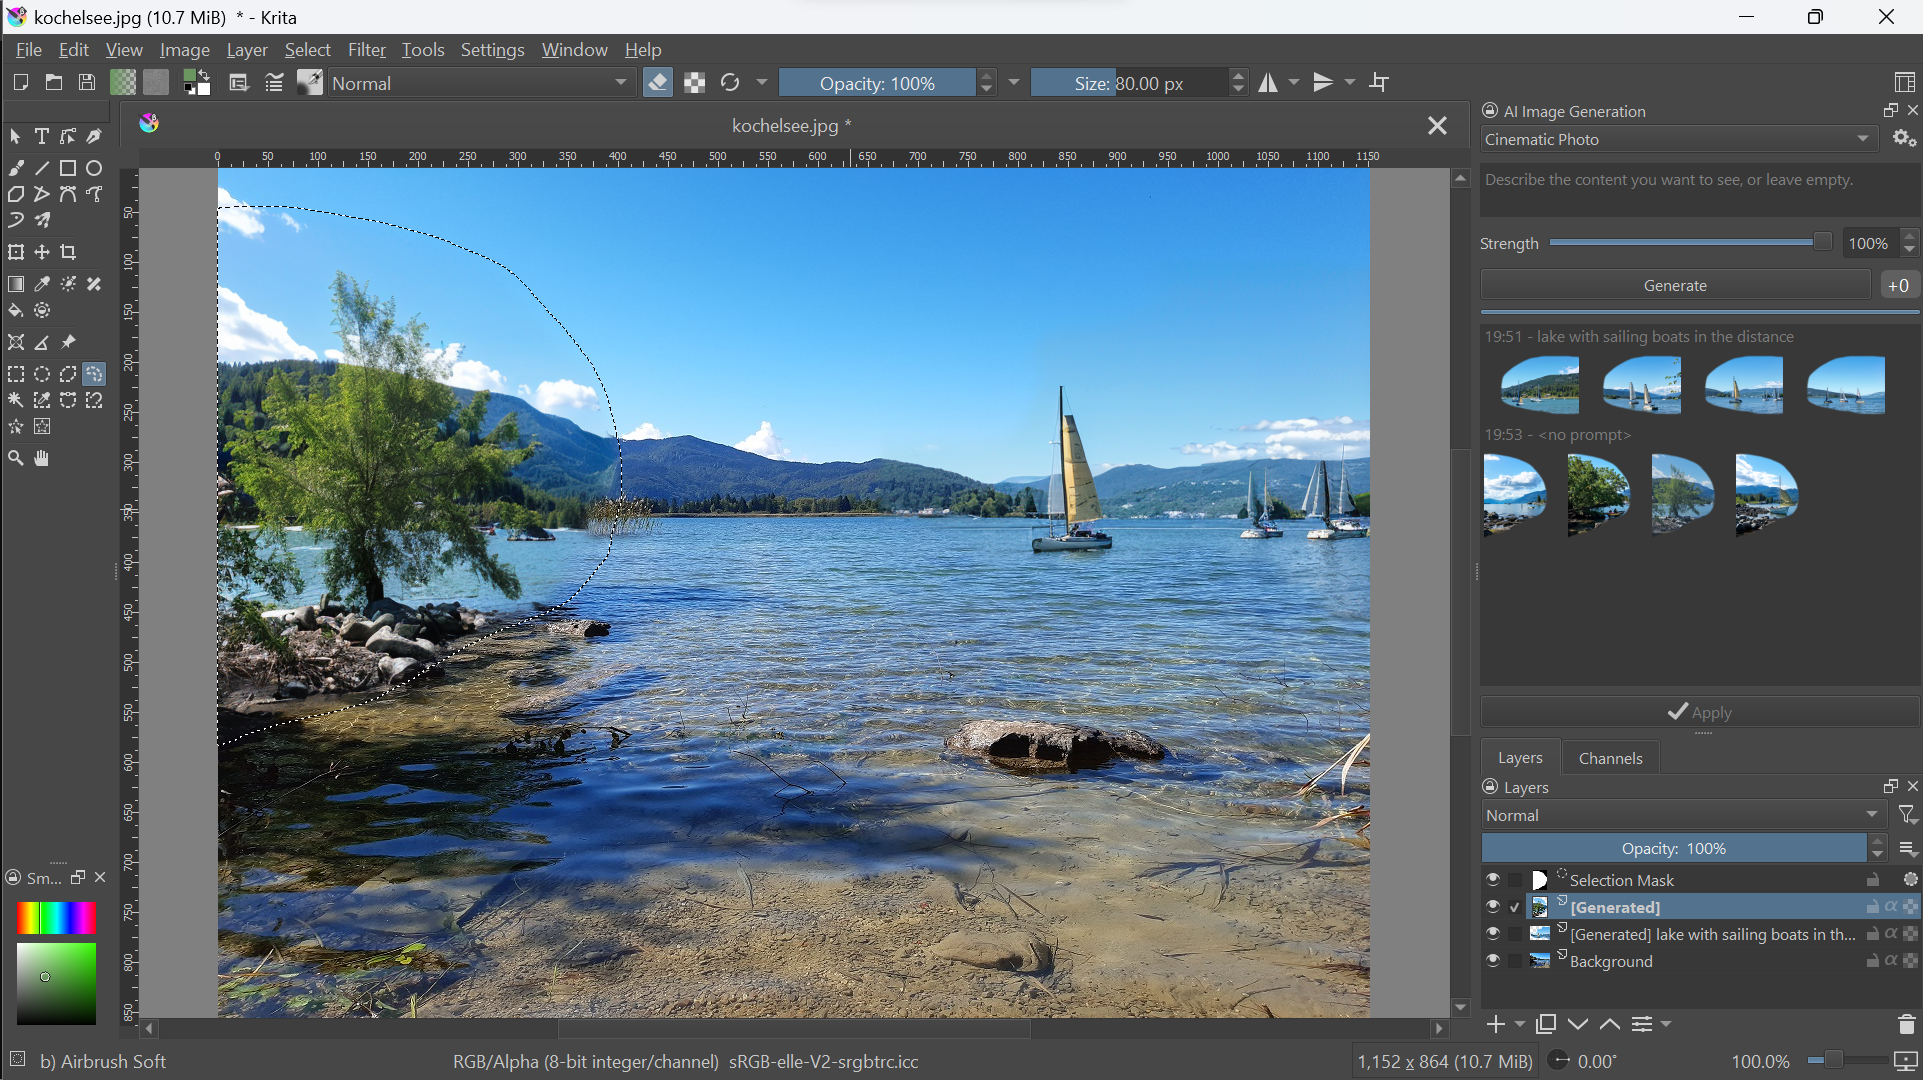
Look at the layers panel in that screenshot rather than the lake. There is a selection mask, and there are generated layers sitting above the background. That is the whole argument for doing this work in a paint app: the generation is a layer you can mask, erase into, colour-correct and throw away, not a new file you now have to reconcile with the old one.
The strength slider is the other control worth learning. At full strength you get new content; lower it and you get a re-interpretation of what is already painted there, which is how you fix a passage you half-like rather than rolling again.
Regions: a different prompt for each part of the picture
The feature that has no clean equivalent in most hosted tools. Regions "assign individual text descriptions to image areas defined by layers", so instead of one prompt describing everything and the model deciding what matters, each layer carries its own instruction.
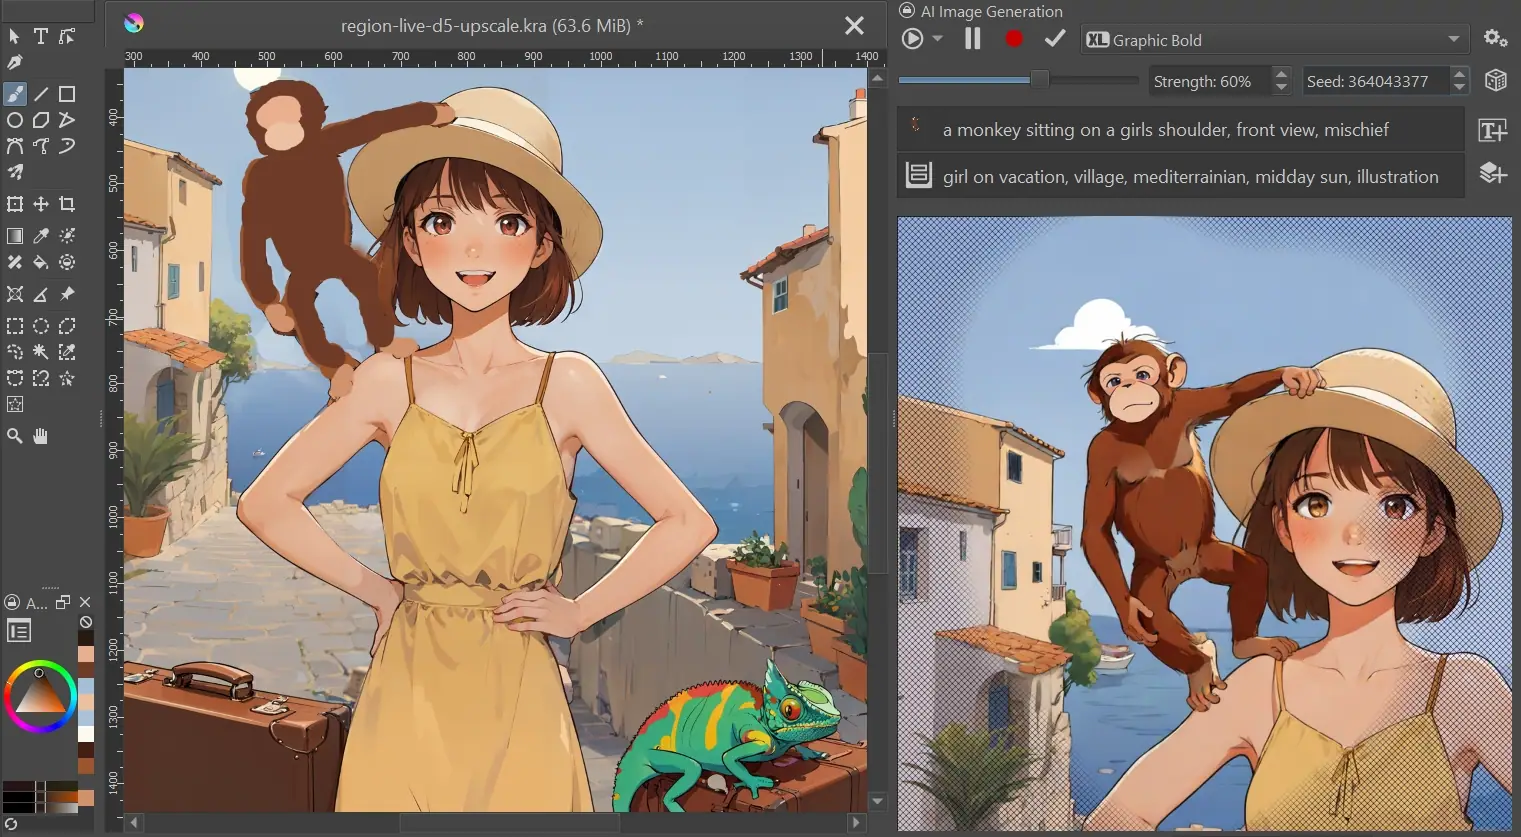
In that example the scene prompt is "girl on vacation, village, mediterrainian, midday sun, illustration" and the monkey layer carries "a monkey sitting on a girls shoulder, front view, mischief". Two separate instructions, spatially anchored by where you drew them.
This is the answer to the problem covered in telling an image model where to put things, where every lever you have is verbal. Here you place the thing and then describe it, which is the order designers actually think in.
Control layers are the sketch-to-render route
The plugin supports ControlNet inputs for Scribble, Line art, Canny edge, Pose, Depth, Normals and Segmentation, as well as IP-Adapter for reference images, style and composition transfer.
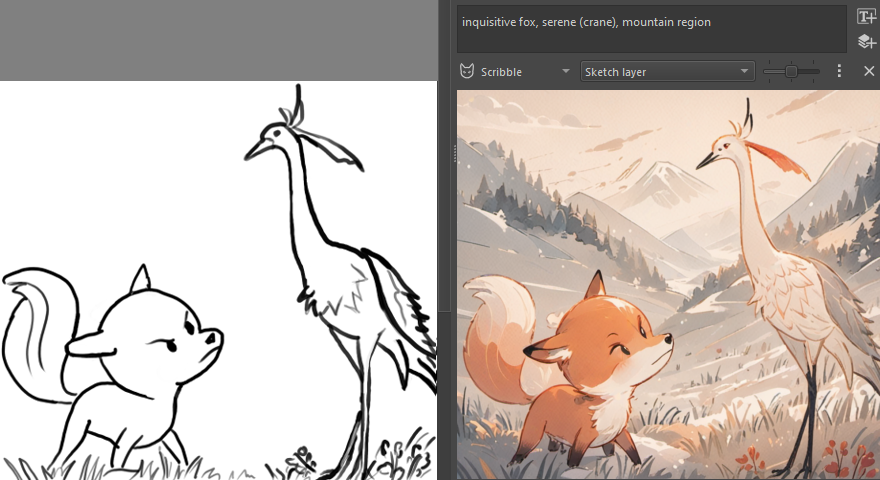
A working order that uses this properly:
- Draw the composition badly, on its own layer. Blocking, proportion, where things sit. It does not need to be good line art, it needs to be the right shapes in the right places.
- Add a control layer and point it at that sketch. Scribble for rough marks, Line art for cleaner drawing, Canny when you are working from an existing photograph.
- Write the prompt for the subject and the light, not the layout. The layout is already settled by the drawing. Spend the words on materials, time of day and register.
- Generate at low strength first, look at the result next to your sketch, and adjust the drawing rather than the prompt when the geometry is wrong. Fixing geometry in words is the slowest way to do it.
- Select the part that failed and regenerate only that, which is the step the whole plugin exists for.
- Upscale at the end. The feature list claims upscaling "to 4k, 8k and beyond without running out of memory".
Pose and Depth are the two most under-used. Pose fixes a figure's stance without you describing it, and Depth holds a room's geometry while the surfaces change, which is the mechanism explained in keeping a character and style consistent.
Live painting, which is a genuinely different feeling
The plugin's Live Painting mode lets the model "interpret your canvas in real time for immediate feedback". You paint a shape, the render updates. It is closer to working with a very fast, very literal assistant than to prompting, and it changes what you spend your time on: less writing, more moving colour around.
It is also the mode most likely to flatten your own hand into the model's style, so treat it as a sketching tool rather than a finishing one.
What it needs from your machine
| Hardware | Support, per the repository |
|---|---|
| NVIDIA GPU | CUDA, on Windows and Linux |
| AMD GPU | ROCm, on Windows and Linux |
| Intel GPU | XPU, on Windows and Linux |
| Apple Silicon | MPS, on macOS 14 or newer |
| CPU only | Supported, but "very slow" |
The recommendation is 6GB of VRAM or more on NVIDIA, with the warning that below it "generating images will take very long or may fail due to insufficient memory". Krita itself must be 5.2.0 or newer, and the plugin installs as a ZIP through Tools, Scripts, Import Python Plugin from File, after which the docker appears under Settings, Dockers, AI Image Generation.
The backend is ComfyUI. The plugin can install and manage a local server for you, or connect to an existing one, including a remote machine, which is the sensible arrangement if your workstation is a laptop and your GPU is in a box under a desk. Cloud generation is offered too, for people who want to start without the hardware.
Which models it runs, and the licence footnote
The feature list names Flux 2, Z-Image, Stable Diffusion 1.5, SDXL and Illustrious, plus edit models for instruction-based changes.
That list is the reason to read the licence on the weights rather than the plugin. The plugin is GPL. The models are not: Z-Image ships with an Apache 2.0 licence file, while FLUX.2 [dev] carries a non-commercial licence, which matters the moment a client's logo is in the document. The differences are laid out in what the open image model licences actually say, and the case for Z-Image specifically in Z-Image runs on a 16GB card.
What this is not
It is not a Photoshop replacement, and Krita is not trying to be one. Krita is a painting and illustration application, and its text and layout tools are not built for typesetting a poster. For layout, typesetting and production artwork, this is the wrong room.
It is also an assembly job. You are installing a plugin that installs a server that downloads models, and each of those can break independently. The payoff is that nothing leaves your machine, which for unreleased product work or anything under NDA is not a preference but a requirement.
A separate plugin from the same author, krita-ai-tools, adds AI segmentation selection tools, which is the missing piece if you came here hoping for one-click subject selection.
FAQ
Do I need to know anything about ComfyUI?
No, for the default path. The plugin offers to install and manage the server, and the feature list explicitly includes "Strong Defaults" with style presets so the interface stays small. Knowing ComfyUI becomes useful only when you want custom checkpoints, LoRAs and samplers, which the plugin also supports.
Is it free?
The plugin is open source under GPL-3.0. Running models locally costs you electricity and a GPU. The project also offers cloud generation as a paid convenience, so "free" depends on which of those you pick.
Can I use my own trained style?
Yes. The customisation feature list covers custom checkpoints, LoRA and samplers as presets you define once and reuse.
Should I use this or a hosted tool?
Hosted, if you generate occasionally and want the best current model with no setup. This, if you paint, if you iterate on the same document for hours, or if the work cannot leave your machine. The deciding factor is rarely image quality; it is whether generation belongs inside your file or beside it.
Sources
- Acly, krita-ai-diffusion repository, read 22 September 2026, source of the feature list, hardware table, installation steps and the screenshots above
- krita-ai-diffusion LICENSE, GNU General Public License version 3
- ComfyUI, the diffusion backend the plugin uses
- krita-ai-tools, the companion segmentation selection plugin
More to read
AI · · 7 min read
One photo in, a 3D model out: what the open image-to-3D models give you
TRELLIS and Hunyuan3D 2.1 both turn a single picture into a textured mesh. The differences that matter are the material output, the VRAM bill and the licence.
Design · · 8 min read
The variable font axes past weight and width, and what they are for
Google Fonts keeps a public registry of every axis it will honour, from Grade to Wonky to Year. Here are the real ranges, and the rule that breaks unlisted axes.